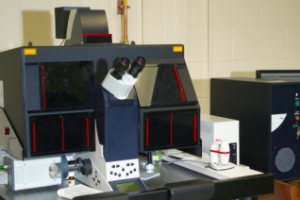
Capabilities:
- TIRF imaging
- Automated or manual alignment
- Variable TIRF depth
- 4 channels
- EM-CCD camera
- Environmental chamber
- Fluorescence source
- Lasers (switch and key switch) - all lasers come on
- Camera controller
- Microscope controller
- Computer
- (if required) Incubator powerstrip
- (if required) Heating Unit
Start Leica Tirf LAS AF software
- Check configuration should say "Tirf_hamamatsu" (if not click configuration and select)
- OK
Incubation
- Temp should come up to 37C for both heating units (stage top insert and the chamber)
- CO2 should be set to come up to 5%
- Pump speed 2, CO2 reducing valve 7.5
- Press display to toggle between real% and set%
- Heating unit should be set to heating intensity 2, ventilation speed 3
Make sure the bottom of the coverslip and the objective are clean, any dirt can make TIRF illumination uneven.
Focusing on your sample
It is easiest to choose TL-DIC or FLUO from the "contrast method" options in the software, press the eyepiece button and the shutter button to turn the light one.
- Transmitted light: Press the shutter button to turn on the light
- Fluorscence: Select the cube you want, press the shutter button
TIRF is only possible with the 100x objective
|
Mag |
NA |
DIC |
Dry/oil |
|
10x |
0.40 |
no |
DRY |
|
20x |
0.70 |
no |
DRY |
|
40x |
0.75 |
no |
DRY |
|
100x |
1.46 |
YES |
OIL |
TIRF Alignment (very easy)
- Click autoalign
- Make sure you are focused on your cells
- Tilt back the condensor, adjust xyz on smart to focus and center laser spot on ceiling mark
- Put the TL condensor back into position and close all the incubator doors
- Press align and save
- When it says "finished" you can close the box with the X in the top right
If you have any problems with the TIRF alignment check that you are focused on your sample at the coverslip.
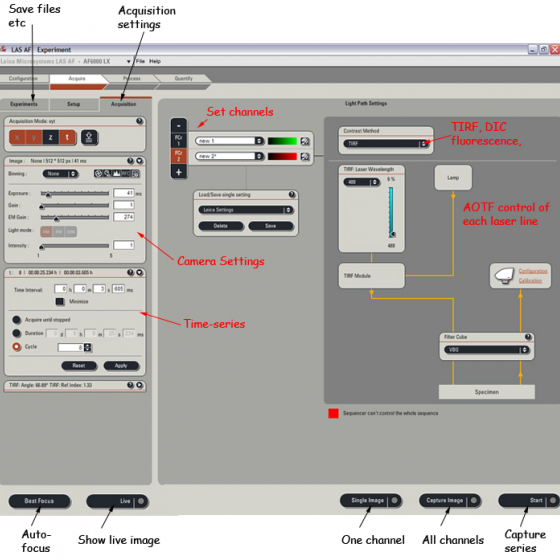
Acquisition mode: Select x y z and t as apropriate (ex XYT will take a single XY plane over time)
Make a setting for each channel you want to acquire - choose contrast methods etc, laser power etc
|
Laser |
Lines (nm) |
Colour of fluorophores |
Examples of fluorophores |
|
405 Diode |
405 |
Deep blue |
DAPI |
|
488 Diode |
488 |
Green |
GFP, Alexa 488, FITC, CY2 |
|
561 Diode |
561 |
Red |
Alexa 568, TRITC, CY3 |
|
635 Diode |
635 |
Far-red |
Alexa 633,CY5 |
Choose suitable exposure times and EM-Gain for each channel
The image window has these settings -
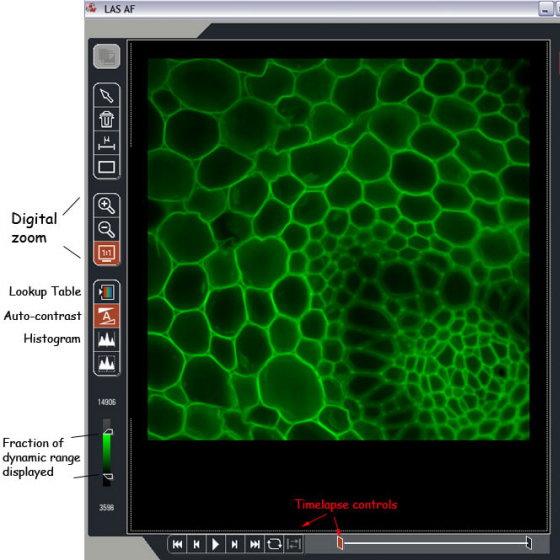
Press Single image/Capture image/Start to capture images
- The files are saved in Leica's .LIF format (same as the SP5)
- The experiments tab shows your files (everytime you pressed "Single Image", "Capture" or "Start")
- Right click for options such as rename, delete, export as Tif . . .
- It is best to not have the .LIF files be extremely large >1GB, consider new experiment for each long timelapse
- If exporting to USB memory etc, it is more stable to save to D:/ then MOVE the data over when the program is closed
Record your use of the system using the CoreResearch booking system
If there is somebody next: logoff and clean-up.
If there is nobody next:
Incubation system must be cooled:
- Turn off heating unit ONLY, turn ventilation speed to 7 (the fan stays on to blow air through the unit and cool it)
- wait about 10 min or until the air and unit feel cool
- then you can turn off the power strip (which turns off the temp control and CO2 unit)
Then everything else backwards:
- Computer from start menu
- Microscope
- Camera controller
- Lasers (switch and key switch)
- Fluorescence source
Please leave the incubator doors closed to help keep dust out of the scope